How to… Build a DIY Ukulele!
Need a music intervention that could address: fine motor skills, following multi-step directions, creative expression, attention to task, or resiliency? One of my favorite experiences I’ve facilitated is creating a build-your-own ukulele kit - I just LOVE how versatile it is.

Step by Step Directions For Building:
Gather the necessary supplies for creating a ukulele - I have used this ukulele kit, acrylic paint and foam brushes for a base coat on the body, paint markers, polyurethane, super glue, basic household tools, and any supplies needed to contain the mess/clean up. (Optional: you can also sand on this step)**
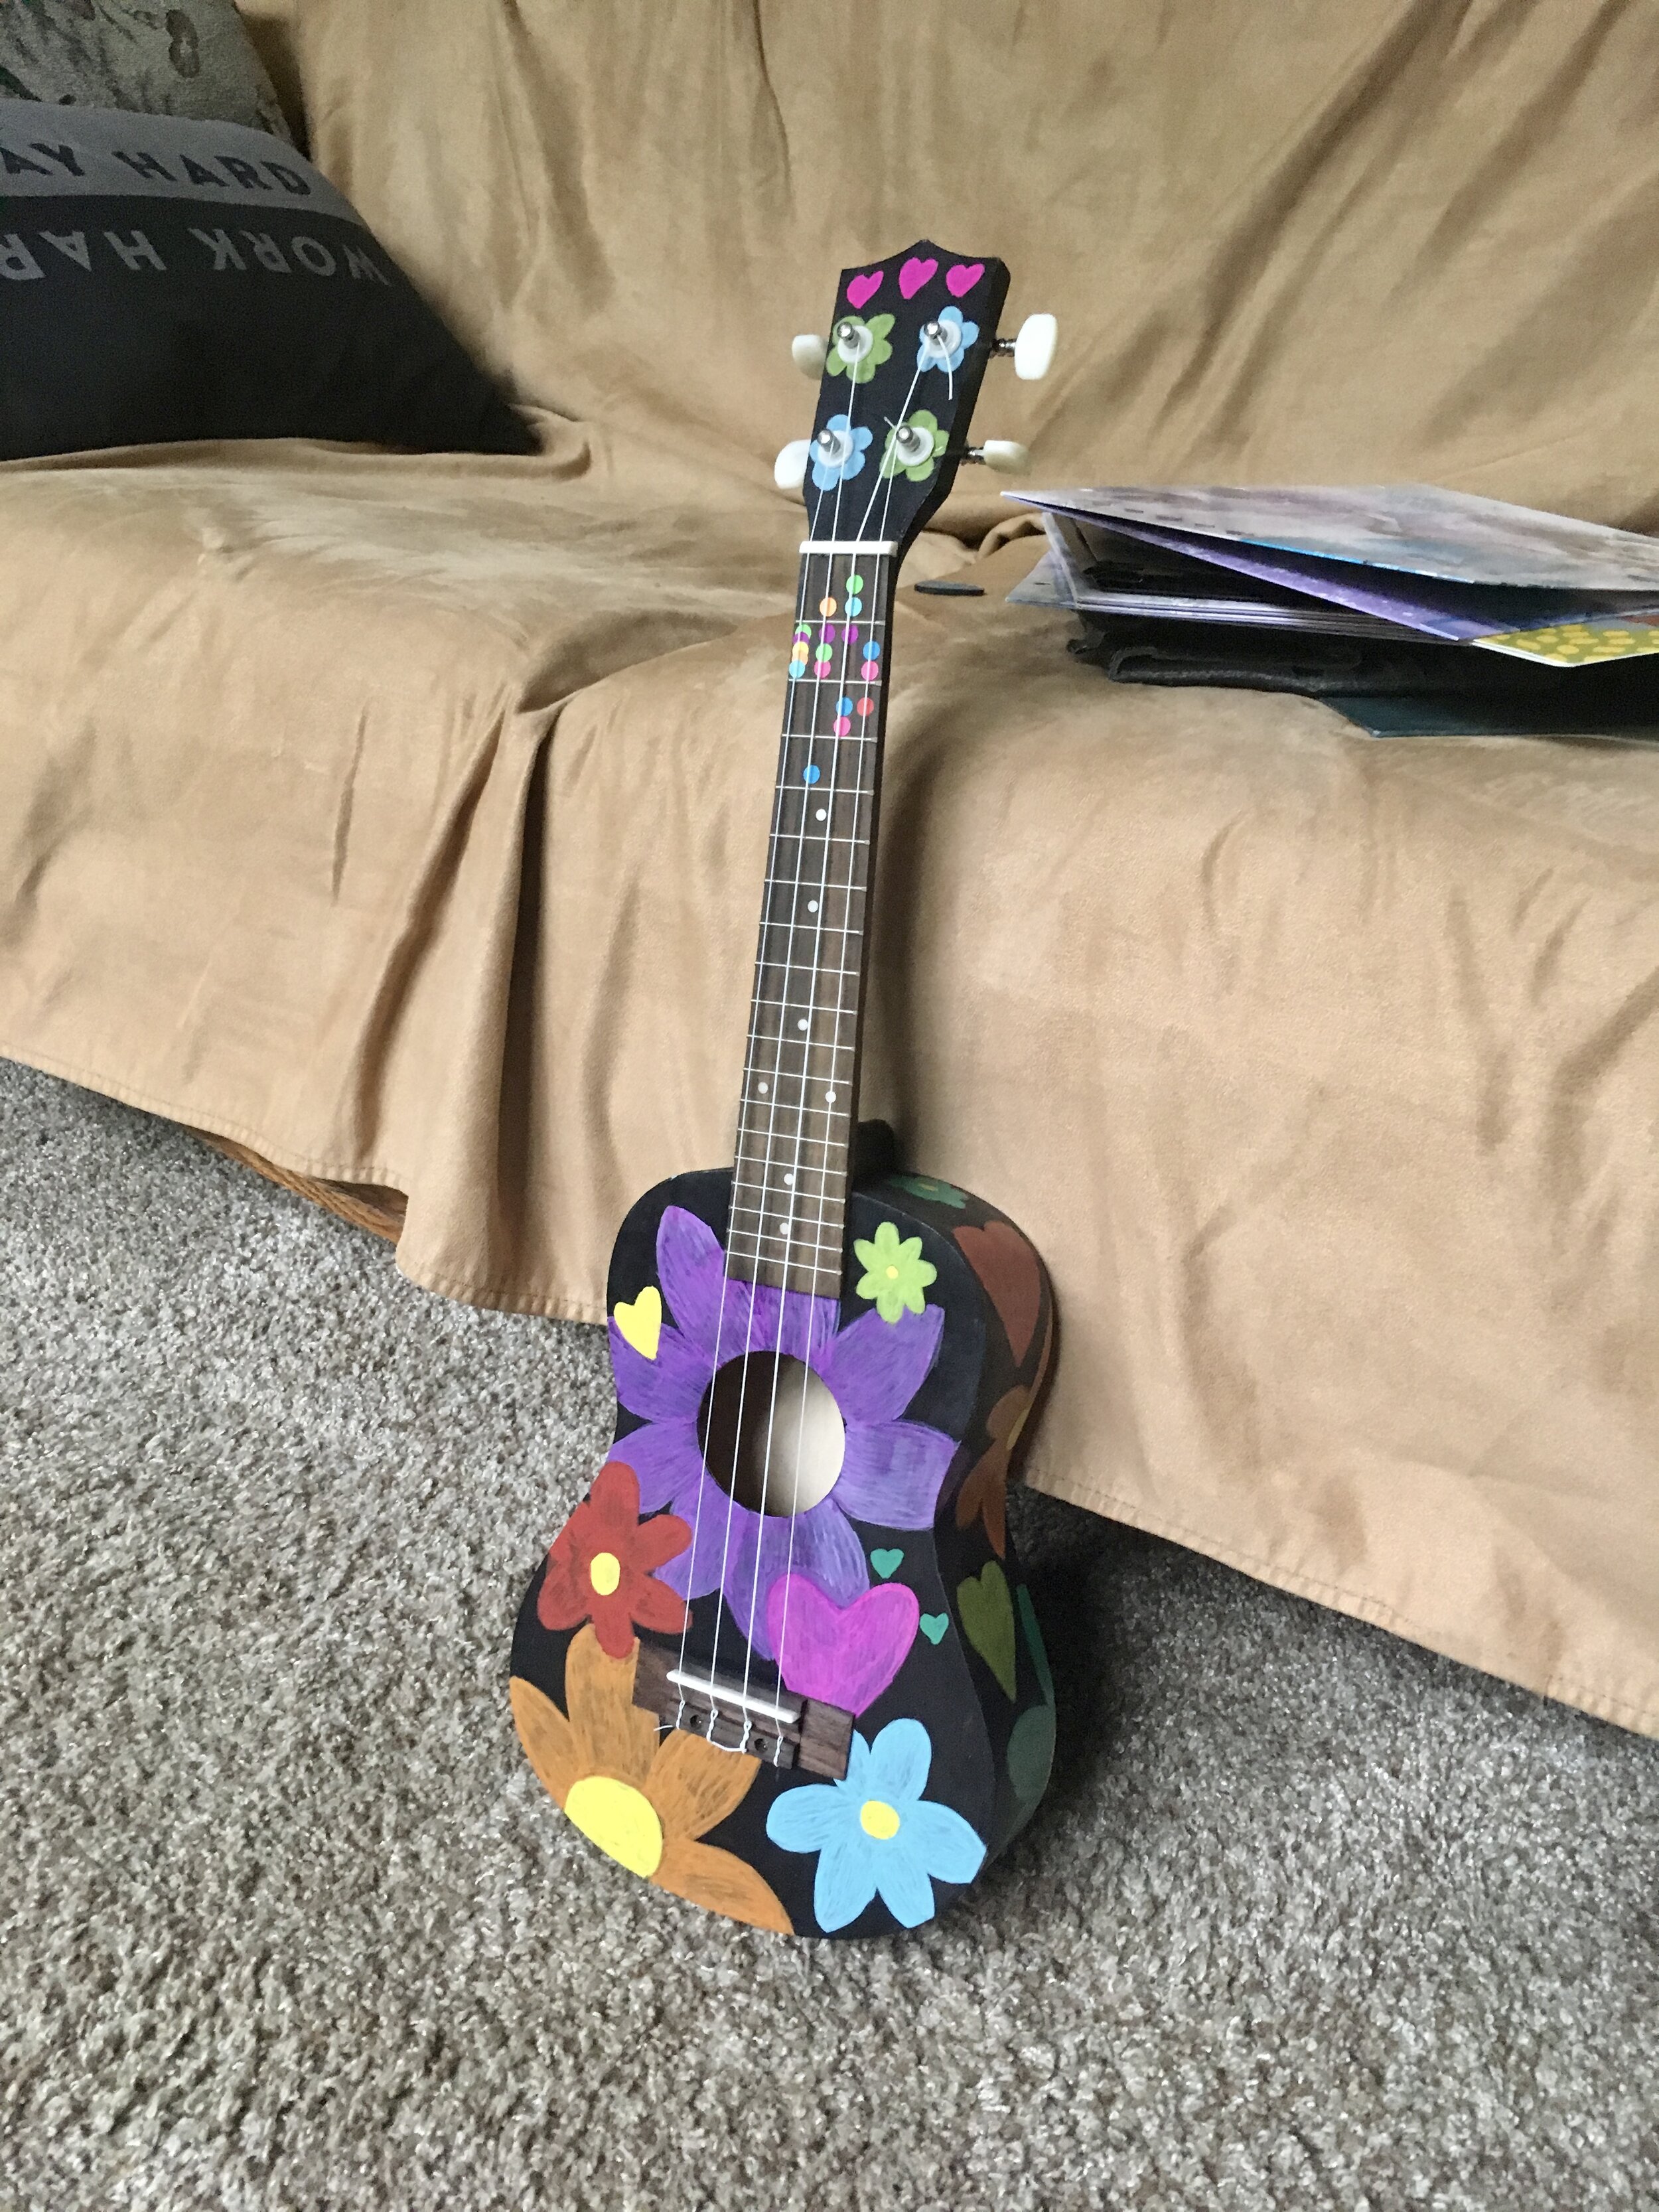
Session 1: Work with your client to pick out a base coat color and end goal design for the ukulele. I’ve browsed Pinterest for design ideas, if you get stuck! Keep in mind the placement of bridge and fretboard when designing. Paint the base coat color with acrylic paint and brushes, then add a second coat if dried/necessary.
Session 2-3: Finish painting the designs on the ukulele with the paint markers. I’ve found these to be better for adding smaller details. Sometimes this takes a session or two depending on the amount of design and drying time.
At Home/Session 4: Coat entire ukulele body and neck with polyurethane to seal in the design. This has helped protect the paint on my clients’ ukuleles.
At Home/Session 5: As the therapist, I have taken the kit home to assemble with glue and screws to not add additional liability in sessions. Depending on the independence of the client, they could play a roll in this process in sessions. Parts to assemble include: attaching the neck and fret board, inserting and screwing the tuning pegs, and glueing/screwing the bridge (which will need to be measured, per instructions). I have bought additional super glue to reinforce all the screws during this process.
Last session: String the ukulele with your client. I generally get this process started, then have them help me wind the tuning pegs.
These steps may not take all of your session time - I found necessary to break up into separate sessions to allow time for the paint and polyurethane to dry. With the rest of the session, you could always start teaching if you have another ukulele available or ask about songs they’d like to learn when the ukulele is finished!
Tips for Teaching Ukulele:
My favorite way to teach chords has been labeling the fret board with these color coding stickers. Place the stickers on the fret board where each finger needs to be placed for a chord. I’ve gone as far as labeling the stickers with numbers of what finger to use.**
I have also gotten colored ukulele strings in the past for my clients. These help you communicate which string they should be playing as you try to teach them. The ones I’ve gotten can be found here.**
Need help teaching your client to play the ukulele after you’ve built it? Check out Stephanie Leavell’s course on Music For Kiddos called “Ukulele For Kiddos-- A Simple How-To Guide,” where she teaches you the basics in 12 simple lessons.
** Disclaimer: As an Amazon Associate, I earn a small commission from qualifying purchases made through links in this post.